Use the Room Events screen to adjust candidate seating allocations and add staff members.
You can access the Room Events screen by clicking the Room Events tab in the left-hand pane.
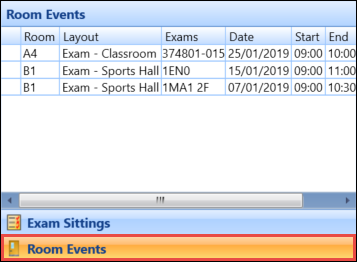
Select a record in the Room Events pane to populate the rest of the Room Events screen.

On the Room Events screen, you can:
When allocating candidates and creating exam events, the candidates are allocated to seats according to the seating rules set up in Exam Seat Allocation Rules Settings by default, unless the rules for the selected event have been configured differently in the Fill Options tab.
To change the seat to which a candidate has been allocated:
-
Edit the seat number of the relevant candidate in the Candidate Sittings list to the required seat number.

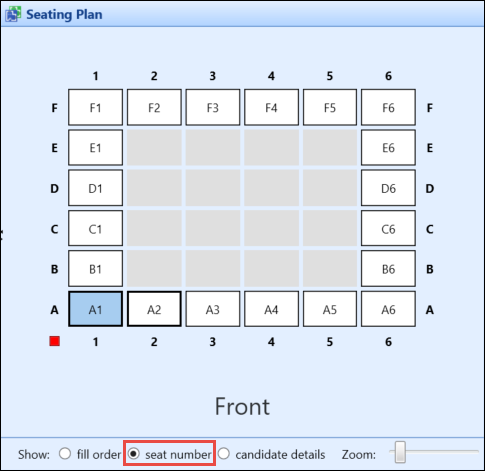
The seat number layout can be displayed to be used as a reference point by selecting the seat number radio button in the Seating Plan section.
If the seat was previously allocated to another candidate, they and the other candidates will be re-allocated to new seats based on the current seating rules.
You cannot allocate a candidate to a seat that is already occupied by another candidate in a seat that is locked.
-
Click Save.
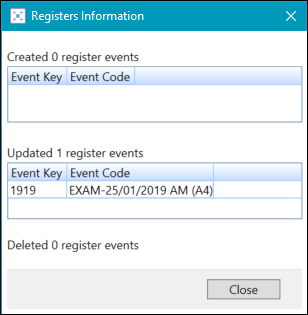
The Registers Information window is displayed, which outlines changes made to register events.
A candidate can be 'locked' to a seat to prevent them from being moved when a seat re-allocation is run. It can be used to lock candidates to seats where other candidates can be added or removed from the room layout at a later date, where users want to keep the existing seat allocations.
Lock a candidate to a seat by selecting the Locked check box in the relevant record in the Seat Allocations tab.

Use the Lock seated and Unlock all seated buttons on the Exam Seating ribbon to lock or unlock all seated candidates.

Click the Clear Seats button on the Exam Seating ribbon to remove all candidates from the seating plan.
This includes candidates with the Locked check box selected.

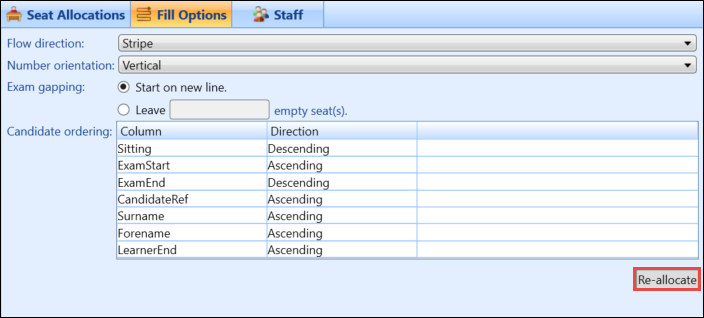
The Fill Options tab provides the same settings as the Exam Seat Allocation Rules Settings. However, changes made in this tab apply only to the current room event and allow you to override the default settings.
After making the required changes to the settings, click the Re-allocate button to re-allocate the seating plan based on the new settings.
Click the Use Defaults button on the Exam Seating ribbon to apply the standard default filling method to the current room event.

The Staff tab lists all staff who have been allocated to the current room event.
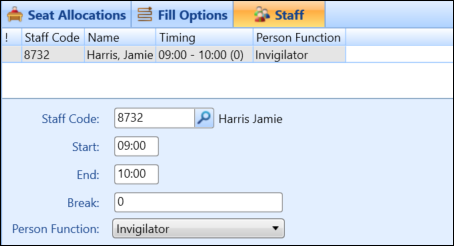
To add a staff member:
-
Click the Add button on the Exam Seating ribbon.

A new row is added in the Staff tab.
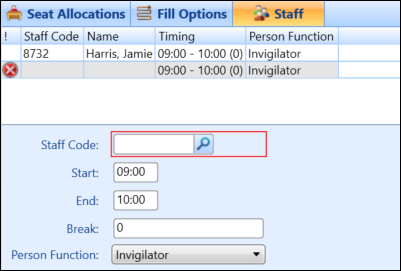
- Enter the staff details.
The fields in the Staff tab are described in the following table.
| This field | Holds this information... |
|---|---|
| Staff Code | The staff code. Use the search button to locate the relevant staff member. |
| Start | The start time. This defaults to the start time of the room event. |
| End | The end time. This defaults to the end time of the room event. |
| Break | The break length in minutes. |
| Person Function | The staff member's role. This defaults to Invigilator. |
-
Click Save.
The Registers Information window is displayed, which outlines changes made to register events.

The Staff tab lists all staff who have been allocated to the current room event.

To delete a staff member:
-
Select the relevant member of staff in the Staff tab.
-
Click the Delete button on the Exam Seating ribbon.

-
Click Save.
The Registers Information window is displayed, which outlines changes made to register events.

The Seating Plan section allows you to manage the room layout and seating plan. It can be used as a reference point when allocating candidates to seats.
The Seating Plan panel allows you to:
-
View which seats have a learner with an unconfirmed entry, which are displayed with a red background
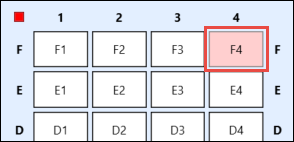
-
View which seats are locked, which are displayed with a thick black border
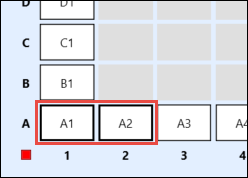
-
View which seats have a learner with special requirements, which are displayed with a dotted border
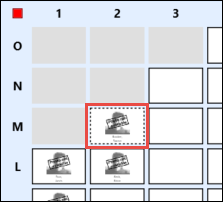
-
Select whether to display the fill order, seat numbers or candidate details by selecting the relevant radio button

-
Hover over a seat to view additional candidate details, provided the candidate details radio button is selected
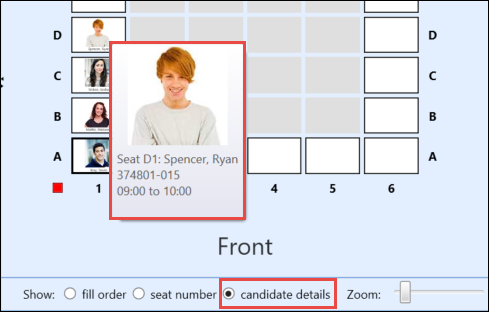
-
Select an allocated seat to highlight the candidate record in the Seat Allocations tab
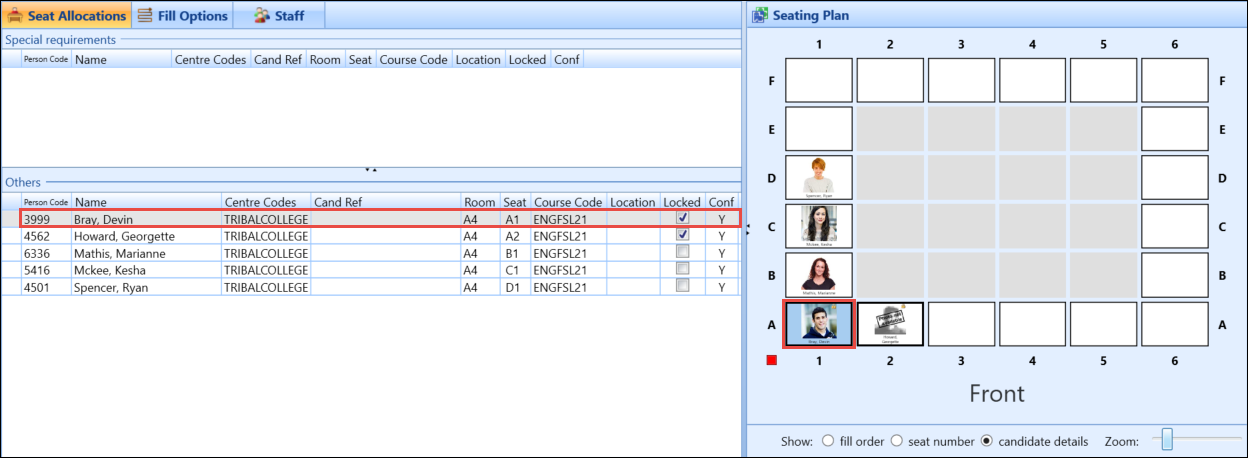
-
Zoom in or out of the seating plan by using the Zoom slider
